Sunday, April 24, 2011

Homemade chocolate fudge

When VC has an intense chocolate craving that must be quickly satiated

Its been a slow and lazy Sunday, with me struggling to finish some pending office work before I head back to work tomorrow. Given that I woke up 3 hours later than usual, decided to paint another picture (rather than get straight to work), blog about the weekend and the strawberry parfait and the cheese omelette (rather than get straight to work), do a batch of laundry (rather than get straight to work). With great difficulty, I managed to get my butt down to it and had finished 1 out of 3 things when VC declared that he had this intense chocolate craving. I was looking for a distraction and a reason to stop working and do something more interesting.

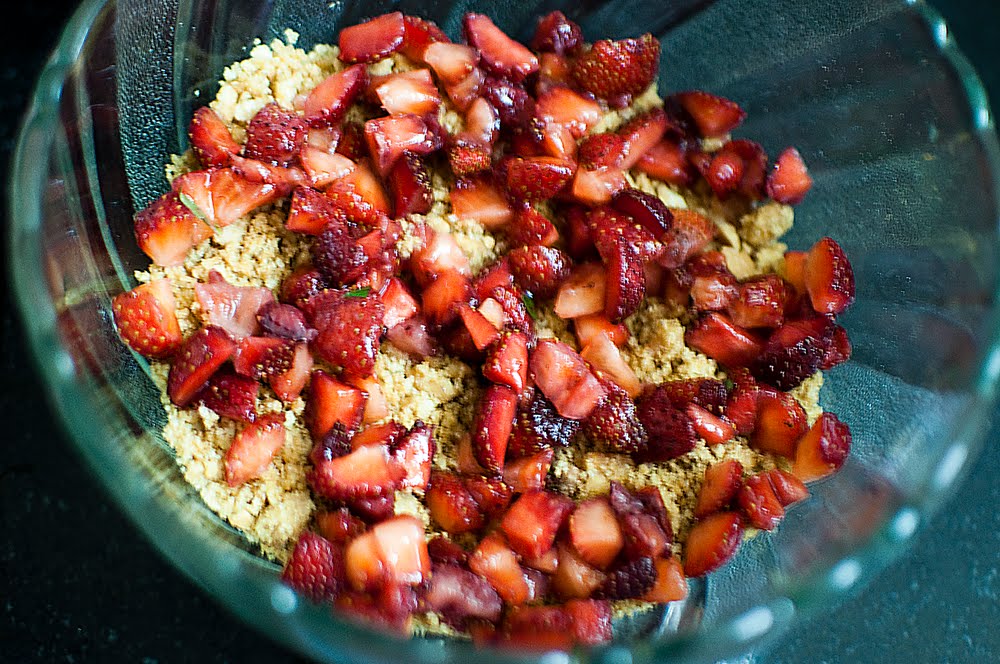
I also had some digestive biscuits and cream leftover from yesterdays parfait experiment, which I knew I could put together with the cooking chocolate thats been lying neglected in the fridge.

The thought of instant chocolate also excited VC enough to volunteer to shoot the process (something he hasnt done in forever) so here is the recipe with pictures a la VC. I dont know about you, but I can tell the difference :)

What we used:
200 gms cooking chocolate
50 ml fresh cream
200 gms digestive biscuits, crushed
A dash of brandy

What we did:

Chop up the chocolate nice and fine.

Put it in a dish, which you can immerse in a bowl of boiling water to double boil, so that the chocolate melts evenly.

While this is slowly melting and coming together, powder the digestive biscuits. Use your hands because you dont want a fine powder, a little rough unevenness is good!

Set the biscuits aside and turn to the chocolate, which should have melted by now. Keep the flame going, stirring continuously until the chocolate is molten and smooth.

Add a dash of brandy, pour in the cream and mix well.

Next, combine the powdered biscuits with the molten chocolate and stir well. This should give you a thick chocolate-biscuit paste.

Pour the mixture into a wide plate, spread around evenly and set in the fridge to cool.

When it has set, chop into pieces and enjoy!

Done!

Cheese omelette

When VC takes over the kitchen

There are days when I just dont feel like cooking. Days when making the effort to chop, saute, blend, mix, season, taste is uninspiring. And I would much rather sit back and read. Or paint. Or browse the internet. Or vegetate in front of the TV.

Yesterday was one such day, and while I continued to paint wishing I had my secret angel to whip up meals in a jiffy, so I didnt have to stop painting, the husband was in the kitchen whipping up lunch for me.

When the husband is in the kitchen cooking, theres ONE thing he can make: EGGS! He can makes eggs in various forms, but his favourite is the good ol omelette. You can't really go wrong with it. Over the months, he's mastered the omelette, with a few variations too!

Yesterday he made this giant, wonderfully fluffy, perfectly seasoned, cheesy omelette that I could swear is amongst the best I have ever eaten. It was so well-whipped up that while cooking, it rose like a cushion-y futon worth of diving into! It was taller than my toast!

Here's what he used:

Eggs
Milk
Salt and pepper
Oregano and thyme (dried)
Grated cheddar cheese

Here's what he did:

Crack open and beat eggs in a bowl. Add in the milk and whip really well. The more you whip and beat, the fluffier the omelette gets, so keep going :)

Add in salt, pepper and any other seasoning you like. Beat some more.

Grate in the cheddar cheese and mix well. Whip some more.

In a pan, drop a knob of butter, melt and spread all around. Pour the beaten mixture, spread it around and cook covered. This really does the trick, the omelette swells up like a little balloon and gets so amazingly fluffy.

When the top is cooked stiff, transfer into a plate and enjoy with hot toast.
Done!

Strawberry yoghurt parfait

Anushruti's Strawberry Parfait, except I didnt make it in "tall glasses" parfait style

The weekend began well with a bright watercolor painting session at the beach, which set the mood perfectly for the rest of the weekend. I love it when something spectacularly joyful happens right at the start of the weekend, because it then feels like no matter what the rest of the weekend is like, I'll still feel happy, satisfied and content. It was such pure joy to be painting again :)

On the way home, still on my watercolor high we stopped by at the market, and I saw some bright and juicy looking strawberries that just looked like they were asking to be bought. Nothing like fresh fruit in dessert. I couldnt have made the weekend better than by using Anushruti's recipe for Strawberry Parfait.

Now parfait is technically made in individual servings in tall glasses. But when I finally got down to making it in the evening, after a day of painting and cleaning up the house and watching Rio in between, we got an impromptu call from Ravi, inviting us to yet another BBQ experiment at his place. Going by the success of Ravi's last BBQ party, it was hard to turn the invitation down!

Last time, I planned a day ahead and took some tandoori chicken along. So considering I didnt have any meat to contribute this time around, I decided to take dessert instead. And thats how the individual servings were swapped for one big bowl. Also, given that I was suddenly now racing against time, I skipped a few ingredients, which I dont think altered the recipe too much (apologies, Anu!) but I intend to try this out again and get it down, pat!

For those who want the "original" recipe, check out Anushruti's most divine blog. For those who want to see what I did, read one..

What I used:

2 small cartons of strawberries
100 ml fresh cream
1 big carton Nestle yoghurt, hung for about an hour
1 + 2 tablespoons of sugar
150-200 gms digestive biscuits crumbled/powdered
2 tablespoons butter

What I did:
First, chop us all the strawberries into small bits. Add in 1 tablespoon sugar, mix well and allow to rest.

Powder the digestive biscuits. While Anushruti does this by putting the whole lot in a ziploc bag and pounding them, in the absence of ziploc bags, I simply put them in a big bowl and crushed them by hand. Add in 2 tablespoons of butter and mix well.

In a large mixing bowl, add the hung curd, 2 tablespoons of sugar and 100 ml fresh cream and whip well.

Thats pretty much all the preparation this dessert requires! Thats another reason it was such a joy. It was done before I knew it. Now to assemble it.

Spoon some cream+yoghurt into a bowl and spread evenly. Next add on a layer of biscuits. Follow this up by a layer of sugared strawberries. And repeat, until you reach the top of the bowl.

End with a layer of biscuits. I also added some chopped walnuts right on top, just for that extra crunch.

Chill until you're ready to dig in.
Done!

Sunday, April 17, 2011

Meaty pasta

Old pasta with a new perspective

This pasta is a combination of a much tried and tested creamy tomato pasta that I make often, along with some tricks from Sandhya's winning meaty pasta. It seemed like a logical and sinful add on for my basic pasta recipe, so I decided to be brave and give it a go. And it turned out brilliantly.

I dont have an oven, which is what prompted me to combine an old recipe with Sandhya's, which involves one round of baking. But for those of you who have an oven, I would advise you to go ahead and give Sandhya's recipe a go. It sounds so yummy!

What I used:
2 medium tomatoes
2 medium onions
5-6 pods of garlic
400 gms minced meat, I used chicken kheema
1 packet of tomato puree
Olive oil
A knob of butter
A dash of wine
Seasoning: salt, lots of pepper, lots of basil (dry or fresh), some thyme, some oregano, some sugar
Cream
Grated cheese
Pasta

How I made it:
You could look over my basic creamy tomato pasta recipe before you begin this, if you like. Because I havent covered each step with a picture this time around. I decided to be brave and go with the flow this time.

Begin by getting all your chopping done :)

Melt some butter and add some olive oil in a deep pan. Throw in the chopped garlic and onion and saute well. Very few smells transport me to another world like the smell of freshly chopped onion and garlic sauteed in olive oil and butter. To call it heavenly would not be an understatement methinks.

Next add in the minced meat and stir around. If youre using chicken, it tends to cook pretty fast, so keep stirring to keep it from sticking.

Add in the tomatoes next, followed by a whole packet of tomato puree.

Next in, a dash of wine. Sandhya uses white wine in hers, but I had some red, and Iv seen Smitten Kitchen recommend it many times in her tomato-based pasta. So I decided to be brave.

The next thing to do is be brave, cover the sauce and let it simmer. The longer the better. I let my sauce be for a good long 45 minutes, opening it occasionally only just to get a whiff and stir it around. Let it bubble away and meld in its awesomeness.

45 minutes later, I opened up the lid and faced a serious tomato-attack. But I decided to be brave and forge ahead, by adding in some herbs. And because my super market didnt have any fancy herbs, I settled for this shady "Tushraj Oregano". This experiment was really all about being brave and going with the flow.

Next up, some cream. As much as your bravery allows you to dunk in. I put in about quarter carton, around 50 ml. And then grate in some yummy meltable cheese. As much as your bravery allows you to. And I dont have pictures to show you how brave I was because my hands were too messy amidst all the cream pouring and cheese grating.

But once it was plated up, I was too hungry to stop and take pictures. I just had to have a go.

The husband and I both devoured our dinner in no time. The quantities were just right, and the cream and cheese makes it filling enough not to even want seconds. For some veggie factor, I put together a pretty decent salad with tomatoes, bell peppers and fresh corn, with a dressing of Balsamic vinegar, salt, pepper and a tiny bit of herbs. It was perfect, if I may say so myself. Being brave has its advantages. And this experiment was proof of that.

Saturday, April 9, 2011

Sambar with palak

Sambar-with-a-twist

Its been a peaceful Saturday. The first in a long while. And I spent the morning tending to all the things I have ignored all week long. The mound of clothes piling up on the bedroom chair, the overflowing laundry basket, the dusty corners of my kitchen, the cobwebs in the balcony, the dining table strewn with random objects (that dont belong there!), and the list is endless. So the day passed by rather quickly, involving such things as changing pillow covers and sheets, taking things down from the kitchen shelf and dusting the area and neatly replacing the boxes, making the dining table sparse like it should be, doing a giant batch of laundry, putting away clothes. And the best part -- Im not complaining :)

Some days are just meant for all things homely. And today was one such. I also had in my fridge what was an utterly green and fresh bunch of palak. It was utterly green and fresh day before yesterday when I bought it, but having soaked a cupful of channa that couldnt be wasted yesterday I had to put off using the palak until today. So while the bunch had lost its really verdant color and crunch, I knew it had to be used now or never.

And what better way to make the Saturday more homely, than with some good ol sambar rice? Except this sambar is a combination of the versions I have heard and read about. So without really following a recipe, I tend to go with the flow and do things as I feel. Like in this instance, throwing in some palak into my pot of sambar.

What you need (for 2 people, 1 small cup of dal):
2 cloves of garlic
1 medium onion
1 medium tomato
1 handful french beans
1 medium carrot
1 small bunch palak
1 green chilli
2 tablespoons sambar powder
2 teaspoons tamarind paste
Mustard seeds, asafoetida and curry leaves for the tadka

What you need to do:
Chop up all your vegetables. The carrots, tomato and beans roughly, but the onion and garlic chopped fine.

In a pan, heat some oil. Throw in the garlic and onion. Saute well till the onions are translucent. Next, throw in the chopped beans and carrots. Saute till lightly cooked.

In a pressure cooker, add the washed dal and adequate water. To it, add the sauteed vegetables.

Next, chop the palak roughly and add it in.

Add the sambar powder, a pinch of asafoetida and salt to taste. Add some more water if required and cook for about 3-4 whistles.

When cooked and the pressure has released, open, add water if required and give it a good stir. Simmer the sambar for 4-5 minutes. Add in some tamarind paste and bring to a boil.

In a small pan, heat up some ghee, when its hot, add in the mustard seeds, asafoetida and curry leaves. Add in the sputtering mixture to the sambar.

Done!

The best thing about sambar is that you can virtually throw in every vegetable, and follow a sequence of rather simple, almost robotic steps and you just cant go wrong. I hope this is as much of a reminder of the warmth of your home, as it was for me.

Monday, April 4, 2011

Caramel custard

Remembering an old favourite, and trying to get it right

With a lot of weekend time on my hands all of a sudden, I have been catching up everything I have ignored for a while. That includes catching up on the many blogs I read, and sifting and sorting through my pictures/movies/data. While going through my hard disk today, I discovered some unposted pictures that were meant to go into this blog. Thats what led to the noodles post earlier today.

I also found a bunch of pictures from a cookout Anand, the husband and I had at home the last time he was down. And I was reminded of the best, most perfect caramel custard we turned out...

It also reminded me about how I have been missing in action from my kitchen, my blog and the hobby of cooking in general. This is such a simple recipe that Anand shared with me, I realised I had almost everything I needed ready at hand. So inspired by the most perfect caramel custard, I decided I must give it another go. Here it is!

What you need:
500 ml milk
2 eggs
1/2 cup sugar (for the custard)
3-4 tablespoons sugar (for caramelisation)
Vanilla essence

What you need to do:
Boil the milk, and add in 1/2 cup sugar, stirring continuously so it is completely dissolved. Set aside to cool.


Crack open the eggs in another bowl and beat till really fluffy. Set aside.

In a pan, spread the sugar out for caramelisation, pour a few cap-fulls of water to moisten it and begin to caramelise on a medium flame.

The sugar will first dissolve, then begin to bubble and slowly caramelise.

If you like it sweet, stop when it is golden. For those who like it slightly burnt, let it cook a while longer.

Pour into the mould and set aside.

Combine the eggs with the milk and mix well. Then pour the mixture into the mould.

Pressure cook for about 20 minutes. And it should come out looking something like this.

Voila! Done!